Step 1.
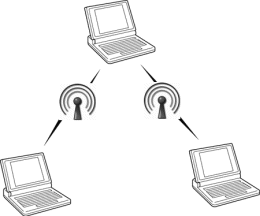
Ad Hoc network is a Local area network and can be set easily to transfer or sharing files and internet connection to multiple computers.
First go to start menu and type "Wireless". After that you should see a list above and from that choose "Manage wireless network".
Step 2.
Then see will see a pop up window in that select "add" button
After that task, click on option "Create an Ad Hoc network" from the pop up window.
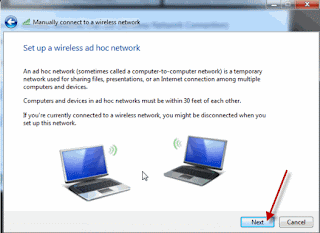
Then you should see a window, says "Set up a wireless ad hoc network" and click "next" from that window.
Step 3.
After that you are required to provide Network name, security type and security key on next open window filed. If you willing to use this Ad Hoc network every time, check "Save this network" radio button.
After done above task wait for a while to create network.
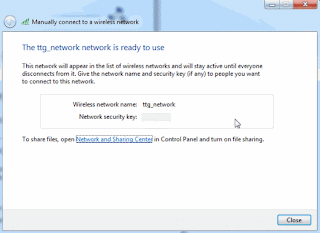
After that you should see message that the network created success fully from the next window.
Step 4.
Thus your next task is to verify the Ad Hoc network by clicking on the wireless icon on the task bar. Then the network name will appear and alongside it a message "Waiting for users".
Step 5.
Now you go to client computer and click on wireless connection icon, from their you should see the network name. Then connect to the network by click on "Connect" option .
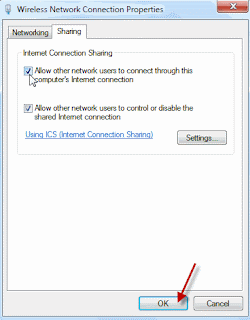
Finally your Ad Hoc network has been established and you are allowed to share files and folder each other. But if you want to share your internet connection, go to host's wireless adapter icon and right click on it. Then go to "Properties" > "Sharing tab" and select "Allow other network users to connect through this computer Internet Connection" check box.
Then click on "Setting" option you can select the network services the client machine can access.
That's all your task done, now you able to transfer or sharing files and internet connection to other machines.


0 comments:
Post a Comment